
Join educators getting weekly insights on AI, co-teaching, and instructional leadership.
By: Matt Rhoads, Ed.D
Dr. Matt Rhoads is a Tech and Instructional Leader and Innovator with hands in Adult Ed, K-12, and Higher Education. He is the author of several books and is the host of Navigating Education – The Podcast.
I wanted to provide a series on HyperDocs and HyperSlides as it is the basis for creating fun, engaging, and interactive lessons for students that can take place within any classroom setting. Lets learn the basics and then expand our knowledge in this three part series!
What are HyperDocs and HyperSlides?
HyperDocs and HyperSlides essentially can take the form of a lesson, instructional strategy, or visual interface. Generally speaking, all of these elements are combined when a teacher creates a HyperDoc or HyperSlide and delivers it to their students during a lesson. What makes them powerful is that they can take students on a creative journey and amplify the content and strategies you’re delivering to your students. HyperDocs and HyperSlides can be built within the Google Workspace and Microsoft 365 platforms.
Throughout this blog series, there will be three posts that cover the following topics about HyperDocs and HyperSlides:
- What are HyperDocs and HyperSlides? How to Build HyperDocs and HyperSlides
- How Can Using HyperDocs and Hyper Create Student Choice
- HyperDocs and HyperSlides Create UDL Lesson Opportunities
Ultimately, the goal is to provide how to use these great integrations with HyperDocs and HyperSlides as well as demonstrate how you can use them to amplify student learning!
Before Building a HyperDoc or HyperSlide – Intentional Design
Before building a HyperDoc or HyperSlide, we must determine what their purpose is before building one. Are we building a lesson slideshow, choiceboard, scavenger hunt, or developing an assignment that requires students to move between multiple documents or slides? This question is important as we must determine what learning outcome we want our students to achieve as a result of designing a lesson that includes a HyperDoc or HyperSlide.
- Determine Intended Learning Outcome As a Result of Using a HyperDoc/Slide
- Design HyperDoc/Slide to Meet that Learning Goal
How To Build a HyperDoc and HyperSlide
To build a HyperDoc and HyperSlide, we must have content. Whether it’s a slideshow or multiple documents, we must have the content first before hyperlinking everything together. Therefore, first and foremost, content is the most essential piece. Once the content has been developed, we can follow several steps to make the HyperDoc and HyperSlide.
- Go to the Slideshow or Document you want to part of your HyperDoc/slide
- Go to the “Share” Button at the top right hand corner of the screen.
- Determine whether this will be a collaborative task or not, which will then determine if you will share the link to all in a viewable format or in an editable format.
- Then, go to the document or slide you would like to add the hyperlink. You will either click the hyperlink icon (the paperclip icon) or use the keyboard shortcut Control + K to insert the hyperlink.
- Copy and paste the link and then come up with a title for the hyperlink to be placed on either the slide or document that is being linked.
Watch the following video of taking these steps and putting them into action.
Developing Lessons Using HyperDocs/Slides – Begin with Templates
After knowing the basics of creating a HyperDoc or HyperSlide, we want to find an efficient way to develop our lessons and strategies using these tools. As a result, one of the easiest ways to create these lessons is to use templates already created or building your own to utilize. Once you have built two to three templates of lessons and strategies you want to use HyperDocs and HyperSlides for in your class, all you will need to do is change the links when the content changes from lesson to lesson when you want to use them.
To build your own template, use the “Table” option for Google Docs. You can create one that looks like this depending on what your lessons goals are for your students.
| Notice | Wonder | Know |
Generally, underneath each heading, you add links, content, videos, or articles you are hyperlinking to.
Similarly, on Google Slides you can do the same by creating Hyperlinks to various Units, Weeks, or pieces of content by using the same “create a table method.”
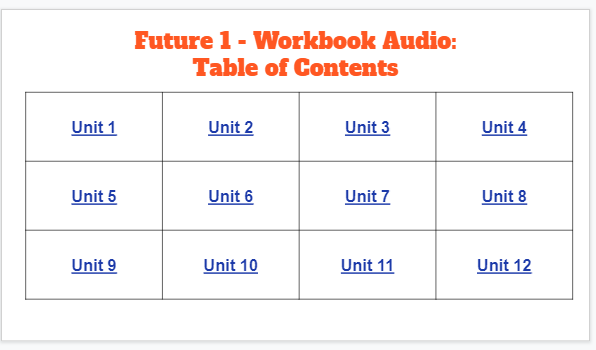
After templates are built, content can be linked directly to them. To reuse, all you need to do is to make a copy and change out whichever hyperlinks you would like to for the new lesson or task you will have students completing.
Templates and More
On the website Hyperdocs.co, there is an assortment of templates for lessons and strategies that can be utilized. All you will need to do is choose the one you would like to use, make a copy, and then start adding the hyperlinked content to the template. You may have to edit a bit of the content, but much of the design has already been done, which helps you build these out for your lessons quickly and efficiently.
Over the next few weeks, the two future posts will be on the following topics:
- How Can Using HyperDocs and Hyper Create Student Choice
- HyperDocs and HyperSlides Create UDL Lesson Opportunities
We can’t wait to talk about how HyperDocs and Slides can foster student choice as well as be utilized to develop lessons that are Universal Design for Learning friendly!
📘 Related Articles
- Building Connection and Relationships with Students Using Interactive Slides Part 1
- Formative Assessments Using Interactive Slides Nearpod and Pear Deck Part 2
- A Series on Active Learning Using Interactive Slides: An Introduction to Nearpod Pear Deck
- Edtech Equity and Engagement Blog Series: Part 2 of 4 Pear Deck and Nearpod Interactive Slides
- Using the Jigsaw Strategy on Google Slides Zoom
Subscribe to Navigating Education
Weekly insights on AI in education, cognitive science and evidence based instruction, co-teaching, EdTech, and instructional coaching and leadership — delivered to your inbox.
No spam. Unsubscribe anytime.
📚 Continue Learning
- See all books by Dr. Matt Rhoads
- Book a consulting session for your school, district, or organization
📚 Continue Reading & Connect
Explore all 10 books by Dr. Rhoads — practical guides on AI in education, co-teaching, instructional leadership, and more. Learn about consulting services for schools, districts, and organizations.
Free Coaching Templates
Download 11 free instructional coaching templates from Dr. Matt Rhoads’ book Crush It from the Start.
v>
📚 Ready to Go Deeper?
Explore Dr. Rhoads’ books for instructional coaches, co-teachers, and leaders — Browse All 10 Books →
Need hands-on support? Book a Consulting Engagement →